|
Page 9
|
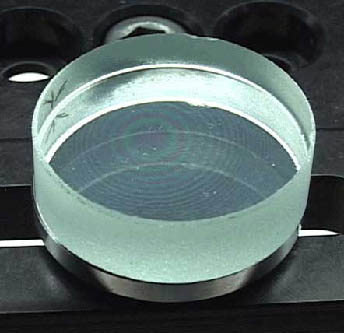
| Move away from any outside windows, so sunlight doesn't interfere with the measurement. Now look for some very faint, colored, alternating light and dark, concentric interference fringes that will be superimposed on the reflected image of the |
|
fluorescent light bulb. They look like faint tree rings, or a bulls-eye, or the bands that you can sometimes see in oil floating on water.
It may take you several tries before you can make these rings out on your mirror, so be patient and persistent. When you finally see the interference fringe pattern, count the small, narrow, dark rings. The number of dark rings you can see, divided by two, will tell you, in wavelengths of visible light, how close to perfectly flat your mirror is. The interference pattern actually maps out the |
|
|
shape of the mirror's surface. The smaller the number of rings, the flatter the mirror is. If you can see fewer than 20 rings, then your mirror is flat within 10 wavelengths of visible light, and you have done your job well.
Keep working to get as few rings as you can, so your mirror will be sufficiently flat to reflect enough sunlight for you to see as the satellite flies overhead in the starry sky. If you just cannot get down to 20 rings, you might have to go back to step 2 and repeat the whole process, starting with the grinding step. We've included just enough extra materials in your kit for you to do this, if necessary, but there are none to waste. Perform inspection steps 14 and 15 for your second and third Starshine mirrors. If you get scratches on any of your mirrors during the flatness measurement step, go back and repeat steps 12 and 13 one last time to get rid of the scratches, and just eliminate steps 14 and 15, since you've already proven to yourselves that your mirror is properly flat. 16 When you have finished grinding, polishing and measuring the flatness of your three mirrors, place the best two of them back into the dark gray foam insert in which you received them, with the stems inserted into the holes in the foam. Also, place your inspection flat in the provided slit in that same piece of foam. Insert the foam rectangle into the self-addressed mirror return box and place a small piece of clean, lint-free lens tissue over the faces of the mirrors to protect their shiny surfaces. Close up the box and tape it securely shut. |
|
|